Monday 29 February 2016

Easy Solution of Edit 4K in Premiere CC now with H.265 natively - Video Converter for Windows/Mac

With Premiere CC now supports H.265 natively, you may got update and tried in time, you found it really do supported edit H.265 4K, but it is not work well. Here we tell you why and give you the solution how to edit any 4K videos in Premiere smoothly without not much quality loss.

I have just tried out H.265 support in Premiere, so a brief word on this now…

First a note about hardware. I am running Mac OS X on a PC with Nvidia GTX 970.

H.265 is demanding on the GPU and I have not tried it on my Macbook Pro yet. I have no idea if the mediocre ATI cards in the Mac Pro have built in hardware support for H.265 like the latest Nvidia 9xx cards.

So on performance I can only speak for the GTX 970 for now. This is a £250 card, so certainly not the most expensive. So if you are not trend to buy a one, is there another way to edit the 4K in Premiere CC?

If you wanna edit 4K videos in Premiere CC or previous version without any problem, you'd better downscale 4K footage to 1080p and transcode the 4K stuff (formatted/encoded in R3D, XAVC, XAVC S, MP4, MOV, MXF etc.) to a more-editing friendly format, such a Premiere's MPEG-2. In the following article, we will show you how to downscale and convert 4K to 2K MPEG-2 videos so that you can edit 4K footage in Adobe Premiere CC without bogging down your computer. The process is surprisingly easy and can be done using Pavtube HD Video Converter for Mac.

It is an easy-to-use yet professional 4K Video Converter truly and fully supports input and output videos at up to 4K resolution. With it, you can effortlessly transcode 4K videos to MPEG-2 with 1080p settings on Mac El Capitan - - ensuring maximum editing quality and efficiency when working with Premiere Pro CC. Besides Premiere Pro CC, the program also supports more professional encoders, ProRes, DNxHD, AIC, DVCPRO, HDV - ensuring the best results when editing with Final Cut Pro, iMovie, Avid Media Composer, etc. respectively. Plus, this 4K Video Converter is also available to customize the output resolutions to any size like 1080p, 2K, 4K as users want.

Hot SearchBlu-ray/DVD to Premiere | MTS to Premiere | MXF to Premiere | MP4 to Premiere | 4K to Mac

Free download 4K to Premiere Pro CC Converter free trial:


Other Download:
- Pavtube old official address: http://www.pavtube.com/hd-video-converter-mac/
- Amazon Store Download: http://www.amazon.com/Pavtube-Video-Converter-Mac-Download/dp/B00QI9GNZS
- AppStore Download: https://itunes.apple.com/de/app/pavtube-hd-video-converter/id502792488?mt=12
- Cnet Download: http://download.cnet.com/Pavtube-HD-Video-Converter/3000-2194_4-76177786.html

Downscale the 4K Video to MPEG-2 for Editing in Premiere Pro CC

Step 1. Load Source 4K Video

Launch the best 4K Video Converter Mac; click "Add Video" and load your 4K UHD files to the program.


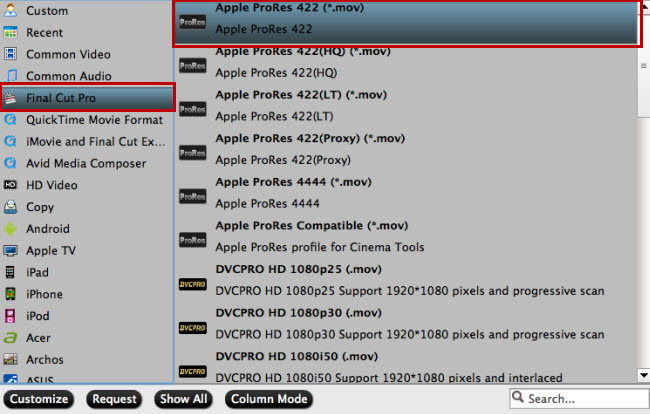
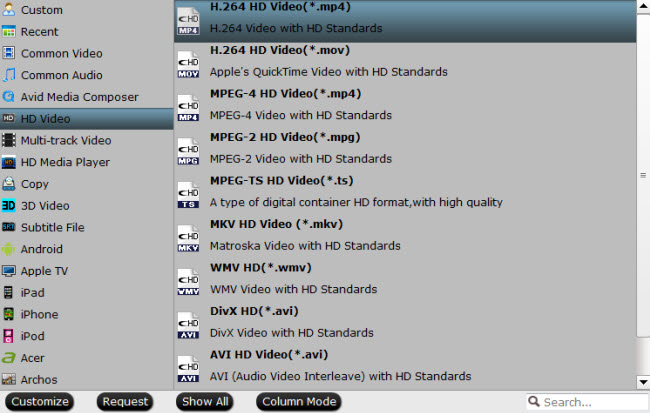
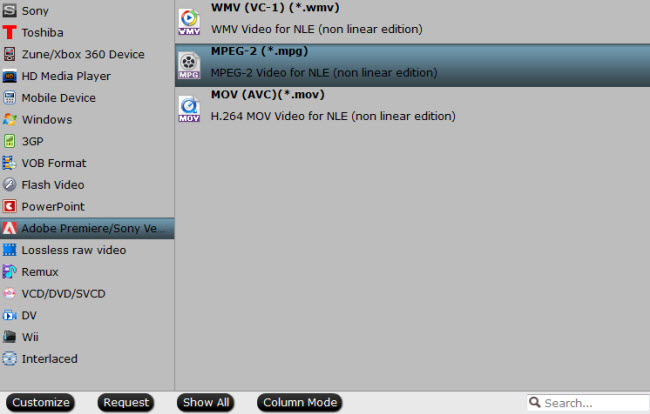
Step 2. Select "Premiere Pro CC" preset as the output format

Go to the Editing Software category and click "Premiere Pro CC" to set it as the output format.


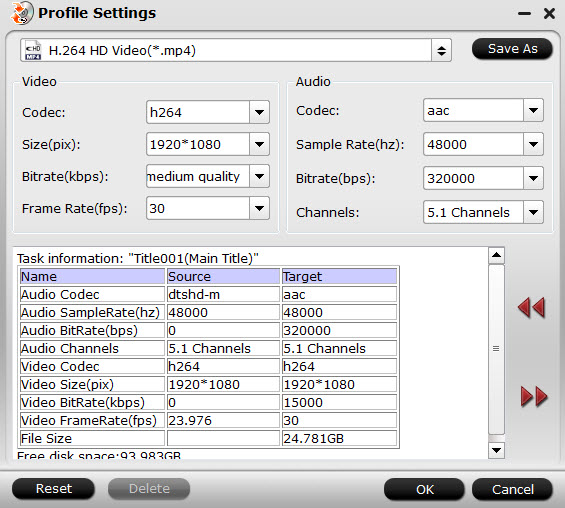
Tips: Adjust video, audio settings

Click the "Settings" button and customize proper video/audio parameters including Video size, bitrate and fame rate and mroe. Usually 1920*1080 video size and 30fps video frame rate are recommended for Premiere Pro CC editing.


Step 3. Start 4K video to Premiere Pro CC conversion

Hit "Convert" button to let the 4K to MPEG-2 conversion on Mac begin. When the conversion finished, check the generated .mpg video for video importing, you will certainly be satisfied with its final video quality. It would be easier for you to edit with Premiere Pro CC.

Read More:

Monday 22 February 2016

Red One 4K videos to FCP X

I have video from a RED ONE that was shot in 4.5k. I want to edit it in Final Cut      X. How do I properly convert this footage to edit in FCP X so I can revert it back to 4k for coloring in post and not lose resolution in the process. Can anyone give me advice on what will effectively edit 4K (like processor wise and memory wise and graphics card wise., etc?) Maybe the current iMac will do it. I’m not sure. Maybe a low level version of the new Mac Pro will do it, I’m not sure. I’m an artist, not a technician.
Before solved the problem, I would give some information about Red One, and why you guys cannot handle the original 4k video in FCP X.
Two generation Red One
The first Red Ones were outfitted with the 12 megapixel Mysterium sensor, capable of capturing up to 120 frames per second at 2K resolution and 30 frames per second at 4K resolution
The second generation, Red One Mysterium-X has a 14 megapixel Mysterium-X sensor. It captures up to 120 frames per second at 2K resolution and up to 30 frames per second at 4K resolution. With the upgraded sensor, the Red One Mysterium-X offers more dynamic range, higher sensitivity and enhanced color management tools than the Red One Mysterium.
Why you guys cannot handle the original 4k video in FCP X
There are many, many flavors of 4K files, and more to come. RED camera for example can be setup to shoot uncompressed RAW 4K, 3X compression, 5X compression, 8X compression, and 10X compression.
With an iMac, or even with the new Mac Pro, to handle 4K workflows effectively, you would have to add-on a Thunderbolt expansion chassis with a RED Rocket card or RED Rocket X card, at least one or two powerful graphics cards such a the GTX 680 Mac Edition, and a beefy Thunderbolt RAID like a Promise Pegasus 6-drive model. All the costs over $18800 totally.
That is to say, there is unfortunately no way you will be able to edit native 4K files at any of the higher quality, lower compression rates. The only alternative on a Mac would be to transcode to a lighter codec, such as Pro Res. Well…yes, if you convert to ProRes and scale to 2K for editing.
Solution Here
The best solution to edit 4K video on Mac with FCP X is to convert Red One 4K RAW files to Apple ProRes codec.Pavtube HD Video Converter for Mac may help you a lot on this convert part, this is the top 4K video converter on the market, it can convert any 4K videos recorded by Red One camcorder or other Red 4K camcorders, Sony 4K camcorders, Panasonic 4K camcorders, Canon 4K camcorders, JVC 4K camcorders, etc. Why need to convert 4K video on Mac to Apple ProRes codec? Because Apple ProRes codec is the native supported video codec of FCP X, once you convert 4K video on Mac to Apple ProRes 422 or Apple ProRes 4444 codec for FCP X, you will be able to edit Red One 4K videos with Final Cut Pro X smoothly. Now please download the the 4K video converter and follow the steps below to convert Red One 4K RAW files to FCP X Apple ProRes.
  
How to Downscale the 4K Red One RAW Video to Apple ProRes 422 for Editing in FCP X 
Step 1: Add Red One camcorder recorded 4K RAW files.
Launch the program on your computer, add Red One camcorder recorded 4K RAW files to the program by clicking the “Add Video” or “Add folder” button.
Step 2: Choose output file format.
From “Format” drop-down option, choose the output format according to your own preference, for FCP editing, choose “Final Cut Pro” >”Apple Prores 422(*.mov)” to output.
Tips:
1.When converting video to Final Cut Pro oriented format templates(e.g. Apple Prores), please ensure that your computer has Final Cut Pro installed, otherwise the converted files will have audio only without image.
2.If you are using FCP X, please make sure you have installed ProApps QuickTime Codecs, or you may get files with sound only without video.
Step 3: Customize output video and audio settings.
Open “Profile Settings” window to adjust output video and audio parameter settings according to your own preference. For smooth workflow of Red One camcorder recorded 4K RAW files with NLE programs, you are recommended to downscale 4K video to 1080p from “Size(pix)” drop-down selection.
Step 4: Start the conversion process.
After all the setting is over, go back to the main interface and hit right-bottom “Convert” button to start Red One camcorder recorded 4K RAW files to FCP conversion process.
When the conversion is completed, following the guides below to import Red One camcorder recorded 4K RAW files to FCP individually.
Read More:

Thursday 18 February 2016

DJI Phantom 3 4K MP4/MOV to Sony Movie Studio 13

If you recorded some videos by DJI Phantom 3, you may like editing the 4K videos . Of course, Premiere Pro is your best choice. With this professional editing software, you can do anything as you want. 

The Phantom 3 Professional, which can do 4K video, and the Phantom 3 Advanced, which only offers 1080p video, but is otherwise the same.

Video Resolution:
  • Phantom 3 Professional: Up to 4K @ 30fps (4096x2160p 24/25, 3840x2160p 24/25/30)
  • Phantom 3 Advanced: Up to 1080p @ 60fps (1920x1080p 24/25/30/48/50/60)
  • Photo Resolution: 12 Megapixel
  • Video Format: MP4 or MOV
  • Photo Format: Adobe DNG RAW and JPEG
But, we can't import the DJI Phantom 3 4K videos to Sony Movie Studio 13 directly due to the codec incompatibility. The Phantom 3 recored MOV files are compressed using the h.264 codec, which is final delivery codec and it is not one you want to use for editing. Therefore you first need to transcode DJI Phantom 3 media to a more editing-friendly format, such a Sony Movie Studio's MPEG-2.

Hot SearchDJI Inspire 1 4K to 1080P | H.265 4K to Ultra HD TV | Compress 4K Video to 1080p

Here you can download and applyPavtube Video Converter for Mac(read the review) to achieve the goal in a fast way. This video converter perfectly works as the 4K to Sony Movie Studio 13 Converter that helps you convert any 4K files to MPEG-2, which is the best format for Premiere to edit with ease. No expensive add-ons or plug-ins are required. With it, you may also transcode 4K video to Avid Media Composer, Sony Vegas Pro, Windows Movie Maker, Pinnacle Studio and more NLE programs highly compatible formats for editing.


Convert DJI Phantom 3 4K videos into Sony Movie Studio 13

Step 1: Add Phantom 3 MOV files

Install and launch the DJI Phantom 3 to Sony Movie Studio Converter, and then click "Add" button to import your Phantom 3 4k files to the software.


Step 2: Choose output format

Click “Format” bar and choose "Adobe Premiere/Sony Vegas > MPEG-2 (*.mpg)” as output format on the drop-down menu. Of course, you can also choose AVI, WMV from “Common Video” as the output format.


Tip: Click the Settings icon to adjust video and audio parameters on the Profile Setting as you need to get the best quality video.

Step 3: Convert Phantom 3 4K to Sony Movie Studio

Simply click the "Convert" button to start converting and everything else will be automated. You're done. Now your DJI Phantom 3 mov files will be converted into MPG files ready to be imported to Sony Movie Studio 13 as well as Movie Studio 10/11/12 beautifully.

Related program:

Pavtube Media Magician / Mac Version: A nice camcorder assistant manager, lossless camcorder video joiner, MTS/ M2TS/ MXF/ MOV/ MKV/ TiVo/ WMV/ AVI/ MPG converter and editor. Meamwhile it supported upload edited video to YouTube directly.

Read More:

Tuesday 16 February 2016

Download 4K Torrent Movies/Videos for UHD TV

Even if a part of people still recognize 1080P is the best resolution for devices and digital files, we should admit that 4K is the inevitable trend in multimedia technology and has been available for TV, camera and online streaming.

A Quick Introduction to 4K and Ultra HD

Before we get started, it’s worth taking a moment to explain a few things about 4K and Ultra HD (UHD), two of the most popular terms in TVs right now. First of all, they’re actually different, though not notably so. A 4K resolution is 4096×2160 pixels, while Ultra HD is 3840×2160, which means it’s slightly narrower. There’s very little real-world difference, and both 4K and UHD will provide a noticeable improvement from 1080p HD. Another name for Ultra HD is 2160p.

You’ll get some people telling you that 4K is a professional production standard, while UHD is a consumer and broadcast standard, and that 4K really only means that there’s a horizontal resolution of about 4000 pixels, which means there can be some variation . . . and those are both true. But for the most part, you’re fine using them interchangeably.

Another thing to note is that some services require that you have a specific TV or 4K decoder chipset for you to watch Ultra HD content. I’ve tried to point out where this is the case below, but when in doubt, check the manufacturer’s or provider’s website.

Where to Download 4K Content

Now that you have an idea of where to get started on finding 4K content for your new 4K TV, it’s time to get out there and put it to use! Let us know what you’re able to find and the strategies that you find useful for finding 4K movies, TV shows, and videos.

There are several online streaming services offering 4K materials. Some of them are free and some others requires subscription fee for watching, streaming or downloading.

YouTube – Support for YouTube 4K video uploads began in 2010. From December 2013, YouTube uses VP9 compression standard for video and offers a 2160p option in quality menu allowing users to view 4K content.

Vimeo – In early December 2014, Vimeo announced that it was ready to be a 4K capable platform. There are 17,539 videos tagged "4K" but only Vimeo PRO members are empowered to stream and download 4K content on Vimeo.

Dailymotion – Dailymotion has pushed out a re-designed video player with fully support for 4K resolution driving users to obtain the superb viewing experience across platforms.

Netflix – Limited 4K movies and TV shows are available to watch and stream if you pay $11.99 one month for subscription. Note: 4K content streaming are only supported by special TV models.

Amazon Instant Video – Like Netflix, Amazon Instant Video includes a certain number of charged 4K movies/TV shows and offers download and stream.

How to Stream the 4K Contents to 4K TV and Other Portable Devices

Pavtube Video Converter / Mac Version (Best 4K Video Converter Software Review) is a professional program enabling users to free convert 2160P 4K content including 4K movies and 4K music videos to standard H.264 MP4 without quality loss from YouTube, Vimeo, Dailymotion and other 300+ sites. Besides 4K, it can also convert 720/1080P HD, 4320P 8K and even 3D movies at a super fast speed. 

Free download the Trail version and have a try, it is 100% clean and safe:


Key Feature of Pavtube Video Converter:

1. Decode the downloaded 2160P 4K, 8K, 1080P HD, SD video contents in MP4, 3GP, FLV, WebM from 300+ sites as soon as possible. 

2.Compress 4K to HD (1080P/720P) and convert 4K video files to MP4, AVI, WMV, MOV, FLV, 3GP, iPhone, iPad, Android, Windows Phone, PS3/4, Xbox etc, with an unexpected fast conversion speed due to the support for hardware encoders Intel and Nivda.

Next, follow the guide below to convert and stream the 4K contents to 4K TV and other portable devices.

Download and install Pavtube Video Converter on your computer or Mac (compatible with Windows 10, 8.1, 8, 7 and lower versions / Mac OS X 10.11 El Capitan, 10.10 Yosemite, 10.9 Mavericks, 10.8 Mountain Lion, 10.7 Lion, 10.6 Snow Leopard, 10.5 Leopard and lower versions). Run this program immediately. We choose the windows version as the guide, Mac version as the same in the steps.

Step 1. Import the downloaded 4K contents to this program by click "File" menu and select "Add Video/Audio" or "Add from folder" to import 4K video files to the application. Or you can directly drag and drop the files to the program interface.


Step 2. Go to the format list by clicking the format bar close to the "Settings" button and choose“HD Video” > “H.264 HD Video (*.mp4)”


Step 3. For other portable devices which have not able to support 4k video playback, you can open "Profile Settings" window, click "Size(pix)" to select 1920*1080 as the final resolution for output video.


Step 4. (Optional) Open "Video Editor" window and switch to the "Trim" tab, you can drag the slider bars to include the segment you want to remain, click the left square bracket to set start point, and click the right square bracket to set end point when previewing the video or directly input specific values to "Start" and "End" box.


Step 5. After all the settings is completed, hit right-bottom "Convert" button to start to convert 4K video to standard H.264 MP4 for 4K TV and other portable devices.

After the conversion, hit the "Open Output Folder" on the main interface to pop out the folder with the converted files. Then you can transfer the converted 4K content into your hardware or stream to your Home server and play it on your 4K TV and other portable devices with no problems.

Tip: If you have uploading your 4k files to video sharing site, click and get solution.

Read More:

Saturday 6 February 2016

Handle with Problems With 4K Video and Most popular 4K players alternative

Windows 7 is having a real issue with the 4k Video files I have. When I right click > properties > details, the frame height and width doesn't exist. Windows media player will only play audio, and VLC lags badly. I finally ended up finding a player that could play 4K, but I'm curious why the files don't have height/width.

Even after rendering 4k from a video editor, the file details show nothing. I should also mention that the icons have no thumbnail.

I'm kinda curious about all these problems but mostly about why the file details don't include Frame width/height. I think it's causing problems with windows media player reading it correctly, because WMP will only play audio.


In the last two years, more and more videos and movies are produced and edited to 4K resolution. Along with this wave, 4K also came to famous streaming video hosting sites like YouTube, Vimeo and others. Generally speaking, you can watch 4K videos in two ways. The one is buy a 4K video player, connect it to 4K display for watching 4K content. While the other one is download 4K from web and play them on computer, mobile or portable devices. Whatever the case, for better enjoy 4K files, owing a superior player is the premise.

Simple recommendation of top 4K players

Conclude from what I said above, 4K media player can either be an external device or a software which installed on computer. In order to explain them clearly, I’m going to introduce the players in two different parts.

Professional external 4K media player

In April, Sony unveiled its 4K media player- FMP-X1, priced at $699. It will be official on sale in this summer. If you buy this player, you can get ten true 4K movies which include The Amazing Spider Man, Total Recall, Salt, Bad Teacher, That’s my boy and more. A bunch of short video clips also will be packed in. Sony has already launched 4K displays and will going to launch two sets of highly cost-effective 4K TV in the following month. These products provide customers great chance to play 4K videos. Set the player to match with high definition display, turn your living room to a mini cinema. Another good news, the fee-based video service will be available in the near future. At that time, users can download more 4K movies and videos from the library.

sony 4k media player

The RED company is the pioneer in the 4K digital camera field. And now, RED’s cinema player is ready for pre-order. This player has a cool name, REDRAY, which priced at $ 1750. For playing 4K videos with REDRAY 4K video player, you should convert videos to the special .RED file with the inbuilt encoder first. Then, just import the .RED files to SD card or USB drive and insert it into player. The rest thing is connect REDRAY player to 4K display or projector, select the video for watching.

redray cinema player

Players from Sony and RED are quite expensive, not everyone can afford it. The fact prompts some people to choose the alternative way, watching 4K with computer. Then, which players can support 4K video playback?

Best 4K video players for computer

Media Player Classic – Home Cinema is a full-featured video player. The app is free and flexible, embedded with various of codecs which enables users to watch any type of video and audio formats. Although you play a large sized video, Media Player Classic can load it in a moment. Take a simple click, it’s super easy to play 4K videos in full screen mode. However, it can be installed on Windows only.

Legendary open source video playback application VLC — widely known for compatibility with a huge number of file formats — received a noteworthy update today. Version 2.1 includes improved audio processing, including proper and complete support for surround sound output. But most notably, this is the first version of VLC to offer 4K playback, though it's still in its preliminary stages. It's still incredibly difficult to find videos at such high resolution, but with a number of 4K TVs and monitors on the market there is certainly some interest.

Play 4K Video in VLC 

VideoLAN has also updated its Android and iOS ports of VLC, with the former now offering support for far more devices than in the past. There are also new "partial ports" of VLC for Windows Phone 8, Windows RT, and the "Metro" interface in Windows 8 and 8.1. Among a list of improvements, video playback itself should be tightened up on mobile devices.

In order to play them easily with VLC, converting 4K to 1080P is a good choice to make 4K video more compatible and keep HD quality. How to convert/compress 4K videos to common used video formats?

Pavtube Video Converter is capable of converting any UHD 4K video to 1080P or other HD formats. Besides changing resolution from 4k to 1080P, you can also transcode between all video and audio formats and set any resolution value you like. The following will introduce a step by step guide on how to convert 4K Ultra HD video to 1080P with Pavtube Vdieo Converter.


Compress 4K Ultra HD Videos to 1080p without Quality Loss for VLC

Step 1: Import 4K video footage.

Launch the app on your computer, click the "Add Video" or "Add folder" icon to import source 4K files to the program.


Step 2: Set output file format.

From "Format" bar drop-down list, choose the output format according to your own needs. For example, you can choose "HD Video" > "H.264 MP4" as your desired output format for watching on VLC.


Step 3: Compress 4K to 1080p.

Open "Profile Settings" window, from "Size(pix)" drop-down list, select "1920*1080" as the final file resolution.


Step 4: Start  4K video footage compressing process.

Hit right-bottom "Convert" button to start to downscale 4K video to 1080p. The conversion will start automatically with a progress bar.

You can find the generated files when the conversion is over by hitting "Open output folder" button. Then enjoy a more smooth video playback on VLC or other portable devices.


Read More: